- 易迪拓培训,专注于微波、射频、天线设计工程师的培养
HFSS15: Creating a Rotated Object CS
录入:edatop.com 点击:
To create a Rotated Object coordinate system (CS):
1. Select the working CS.
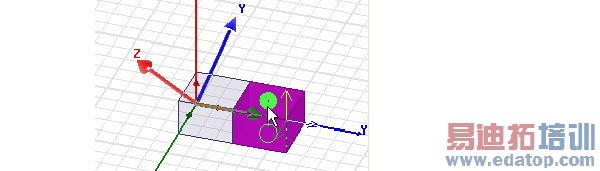
2. Select the object, and click Modeler>Coordinate System>Create>Object>Rotated
• The origin is taken as {0,0,0}. You can edit this later through the Properties window.
• The GUI is in multi select mode where you define the direction by picking any of vertex, straight edge, planar face or conical face.
• If you select vertex, direction from origin to vertex defines the axis.
• If you select a straight edge, the edge direction defines the axis.
• If you select a planar face, face normal defines the axis.
• If you select a conical face, the face axis defines the CS axis.
• The selected vertex, edge or face must be on the selected object.
3. You are prompted to first select X axis. A preview of X axis is shown for valid selections.
4. You are later prompted to select to define the XY plane. Another direction (edge or face selection) or point (i.e. vertex selection) helps to define the plane.
• During 2nd XY plane selection, a CS preview shows as the cursor hovers over valid selections. The preview includes the three CS axes and the XY plane.
• In 2D modeler, you are prompted to select only X axis. The Y axis is defined based on 2D modeler type. This resembles Relative CS behavior. Face picking is not available in 2D modeler as it defines the direction out of plane.
HFSS 学习培训课程套装,专家讲解,视频教学,帮助您全面系统地学习掌握HFSS
上一篇:Creating an Object CS that is Both Offset and Rotated
下一篇:Creating an Object from a Face